We started with a basic sponge recipe (given in a previous post) adding 30g of cocoa powder to make chocolate cake. Whilst that was in the oven we made Ganache to ice it with.
This is the recipe
250g chocolate, chopped into small pieces
100 ml cream
50g butter.
Heat the cream and butter until boiling, pour over the chopped chocolate and leave for 10 minutes until melted. Maybe i stirred too soon, but I found my chocolate hadn't quite melted so I needed to heat it slightly to melt the remainder. The problem with this is that as you stir, air bubbles get trapped . more about that later.
While we were waiting for all this to cool, we had a quick tutorial in making piping bags from greaseprrof paper.

Make a square of greaseproof paper by folding the bottom corner over to the opposite edge discarding the excess


With the straight edge along the top, draw one of the top corners down to the bottom point turning as you bring it down so that the underside is facing up - thats a difficult action to describe, but I hope you can see what I mean from the picture

now bring the other corner down to the bottom point by wrapping it around the back
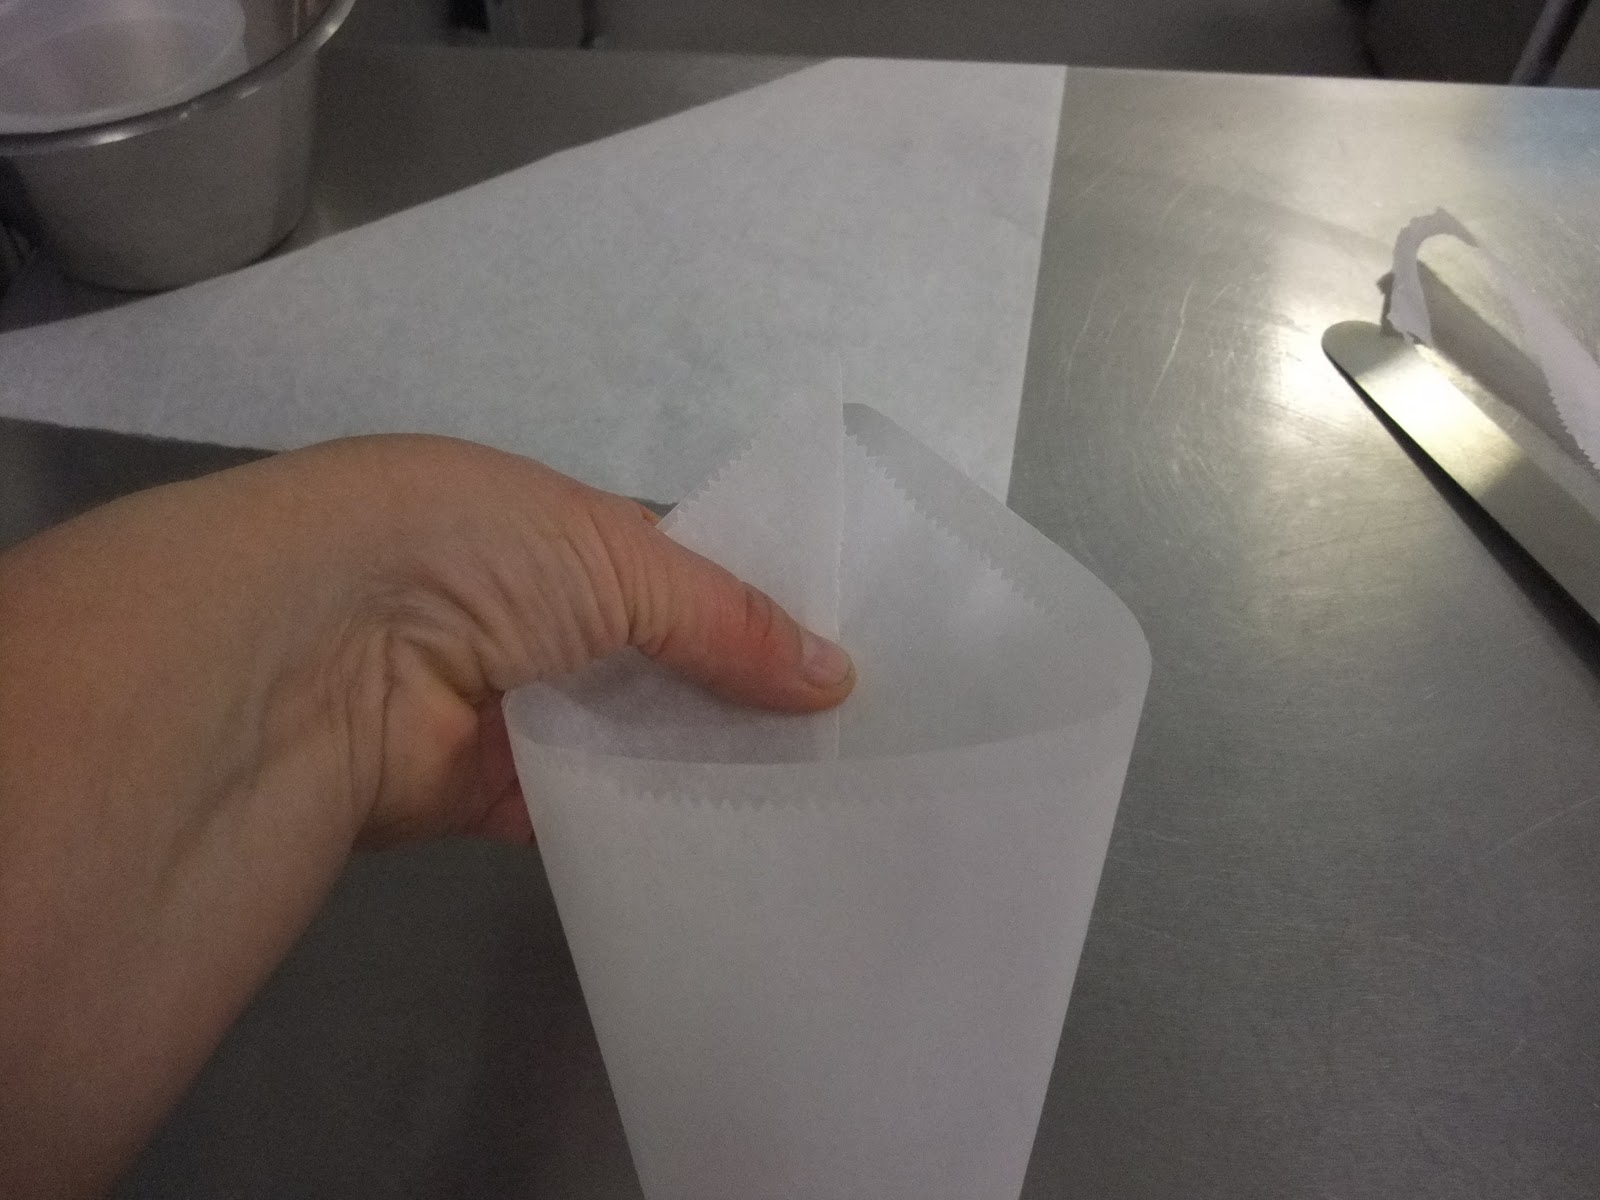
I've turned it upside down here to get a better view. lastly you'll need to secure the edges by folding them over towards the inside of the bag. The tutor suggests stappling!.

These are useful for small amounts of icing or drizzling.
So ...... cake out of the oven and cooled, we poured over the chocolate lettting it drip down and over the sides. At this stage it's best to leave the cake on it's cooling rack so that the excess ganache can drip down onto the tray or greaseproof paper. Using our piping bags and melted chocolate we decorated our cakes. I went for the cobweb look! Is there a name for that technique? using white chocolate and starting in the centre, I made a spiral and using a toothpick dragged the point from the middle to the outside.


It's not clear from the photo, but those bubbles were still there ..... easily removed by popping with toothpick!

Here are some of the others.


Next week, tempering chocolate and chocolate modelling.
No comments:
Post a Comment